| In order to assign a person — for example as an inventor or applicant in files, or as a contact person for a company — the person must first be created as a contact. The entry is made in a dedicated input mask for persons. |
| Practical tip to avoid creating duplicate contacts: use the filter bar to search for existing persons before creating a new entry. |
1. Open Contacts in the main menu and select the "Contact" tab. 2. Click the green "New Contact " button. |
 |
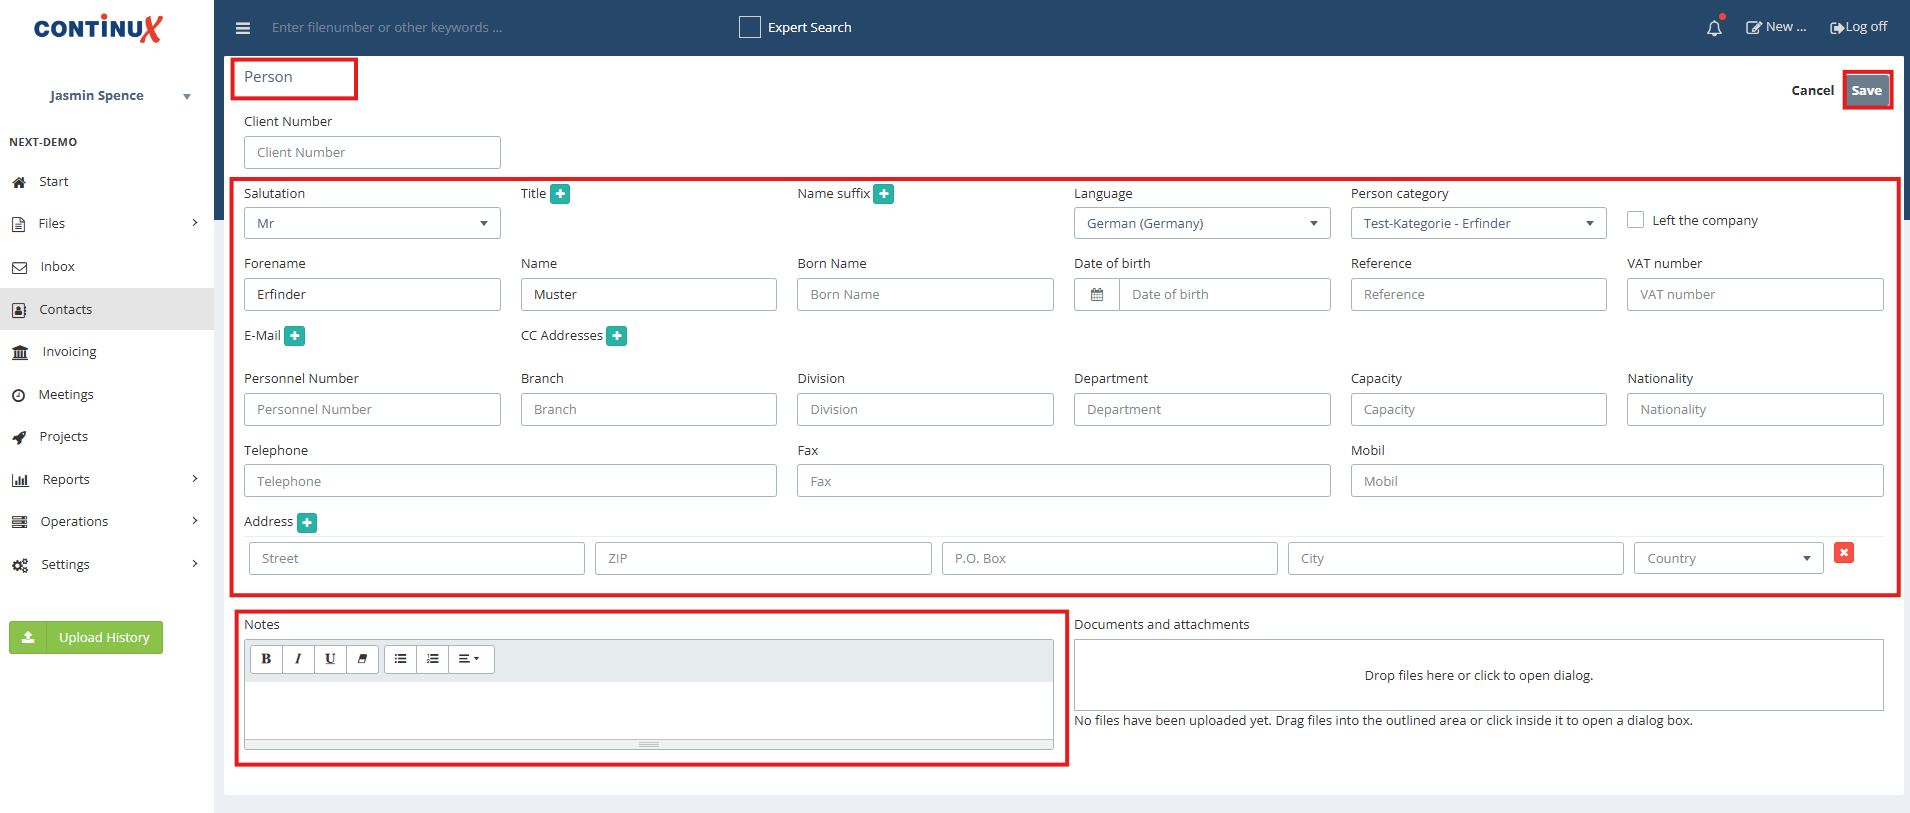
| 3. The Person input mask opens. 4. Enter the relevant data in the fields and, where applicable, select a person category. 5. Enter any notes in the notes field (optional). 6. Complete the process by clicking "Save". |
 |
| Note: Linking a person to a company is done via the company. Both the company and the person must already be created as contacts. |
| Further Links and Related Articles ➔ Creating a Company in Continux ➔ Sending e-mails to copy recipients (CC addresses) |
War dieser Artikel hilfreich?
Das ist großartig!
Vielen Dank für das Feedback
Leider konnten wir nicht helfen
Vielen Dank für das Feedback
Feedback gesendet
Wir wissen Ihre Bemühungen zu schätzen und werden versuchen, den Artikel zu korrigieren